Bulk user upload

If you have a lot of users, you may find it more convenient to upload them from a CSV (comma separated values) file.

Select your CSV
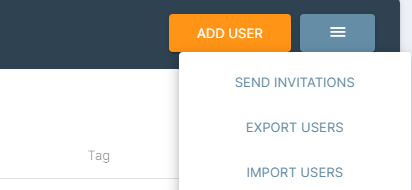
To do this, navigate to the User Tab (accessible for Admins only) then click the 3 line icon where you can then select Import Users and select your file (as shown in the images below). 
 
Screen capture of the user interface  showing buttons for adding a user and a dropdown menu with options for sending invitations, exporting users, and importing users.
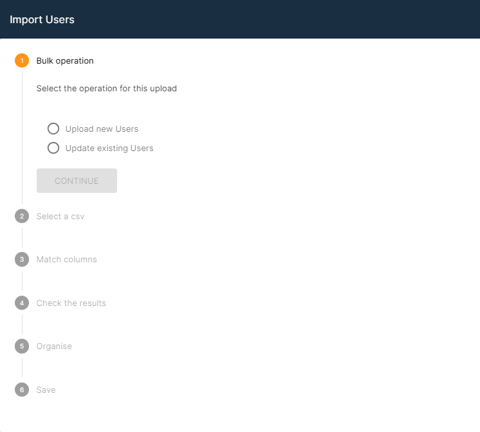
Screenshot of the interface for importing users via CSV file with six steps listed.
 
The csv file can have any number of columns, but will typically contain names and email addresses separated by commas, like shown in the image below:
Screen capture showing an example of a CSV file containing Names and Email Addresses separated by commas
Alternatively, you can create a spreadsheet to compile the data and download it as a csv file. Just like demonstrated in the image below, the spreadsheet should contain columns with the user's:
  • Name
  • Email
  • Role (the role this user should play within Bodyswaps Go)
  • Tag (not required)
Screenshot of a spreadsheet with columns labeled Name, Email, Role, and Tag. An example entry is shown: Laura Heath, laura+2023@bodyswaps.co, Learner, N2023.


Match the columns

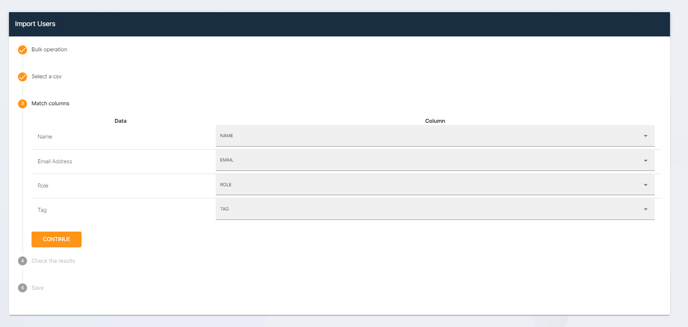
Next you need to specify which columns contain the names, email addresses, user's role and tag. Accepted values for role are learner, admin & coach only..
Just select from the drop-down list for each field and click Continue.
User interface for importing users showing a step to match data fields with CSV columns

Please note: if your upload does not include a title row, the data used to match the columns with the correct data points in step 3 will be omitted from the user upload. We would advise that you have a title row listing the information contained in that column or order, such as: Name, Email, Role, Tag to ensure learner data is not missed in the upload. 

Check the results

Any lines that have errors like an empty name or invalid email address will be highlighted in red (show in the image below) and must be fixed before continuing.
Table showing entries with names and emails. The second row is highlighted in red, indicating an error.

If everything looks good, click Continue.

Organize and save
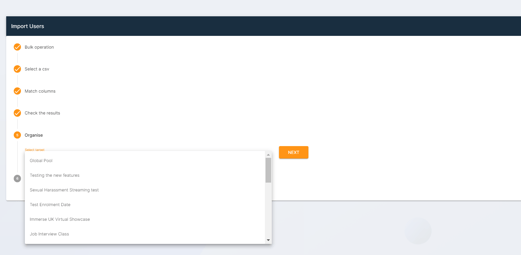
The last step is optional, but you can upload users directly into a class that has already been created on your account.
 
If you don't have a class for them to join yet, we'd recommend adding a tag and uploading them into the Global Pool until you have created the class. 
 
Screenshot of a software interface for importing users, showing five completed steps and a dropdown menu to select a class for organizing imported users.
 

Note: by selecting a class, this will import users into the class but will not automatically invite them to participate in training, you will need to Send Invitations on that particular class page to trigger this. 

Note: by selecting Global Pool, Learners will be uploaded but not sent an invitation to register, you will need to Send Invitations on the User Tab to trigger this. If you upload Admins or Coaches, they will automatically be sent an invite.