
The Classes screen is only visible to Coaches and Administrators.
We've recently released a brand new Classes dashboard as part of the Bodyswaps 3.0 upgrades. Whilst the updated classes page is in Beta, you can manage classes in both views - however we strongly recommend using the new page going forward. Learn more here.
Classes are a convenient way to manage groups of users and also allows you to invite learners to use Bodyswaps in a streamlined way.
When clicking on the classes tab, you are shown a list of all the classes you have created or are an editor of:

On each row, click on:
- the pencil icon to change the settings of this class.
- the trash can to delete this class.
- the name of the class to see all the enrolled users and their progress.
Use the search bar to filter by any value.
Creating a class
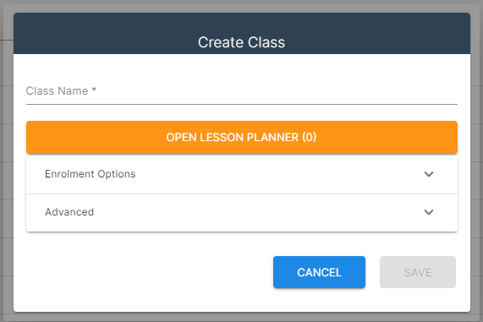
Lesson Planner allows you to read more about the training that you can assign (including a content summary, the languages available, captions available, and any relevant tutor notes) and it will track the estimated duration of the class content based on your selections as shown in the image below.
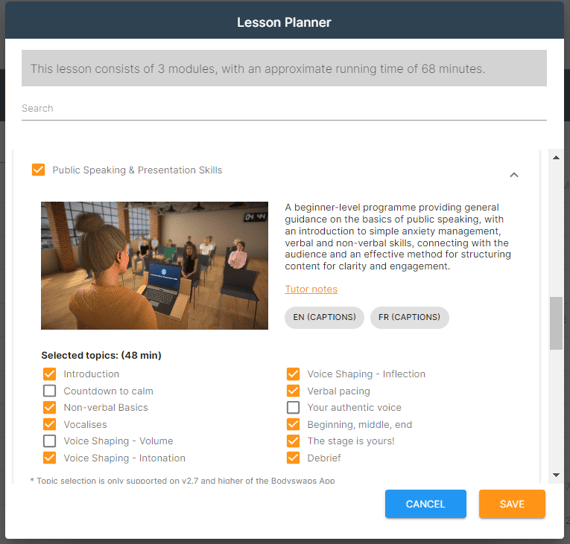
Note: For our Public Speaking & Presentation Skills module, containing a range of sub-topics, you can select which topics you'd like learners to access as part of the class.
Updating Class Content
You can change what modules are in the class at any time (even after you've shared the class and have learners enrolled).
Enrolment Options
Class enrol can either be done by the class administrator or there is the option for users to self enrol.
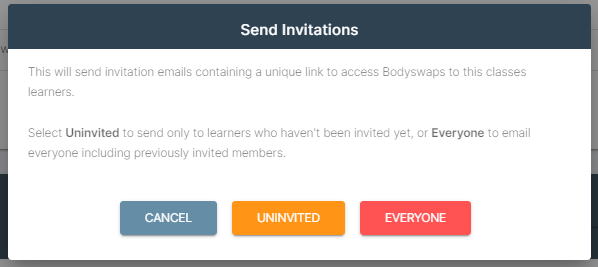
- Normal enrolment (default) - the class admin adds learners to the class from the list of existing users. Once added, the class admin will need to invite the learner(s) to enrol into the class by selecting the mail icon next to the learner's name. An invitation email is then triggered with instructions on how to join the class. Bulk invitations can be sent by selecting the 3 line icon within the class and then clicking SEND INVITATION.
Note: Learners must have their name and email address added to Bodyswaps before they can be added to the class this way.
- Self enrolment - the class admin distributes a unique URL, QR code or class code to learners, who enter their own name and email address and is then added to the class. Anyone with that URL can join the class. To avoid abuse, there are some additional optional controls:
- to restrict class enrolment to existing users that the admin has added to the system.
- to restrict email addresses to particular domains, for instance, your organisation’s domain (e.g. @acme.com).
- to require users to verify their email address by responding to an auto-generated email, prior to joining the class.
- to cap the number of users who can enrol to this class.
- Bulk User Enrollment into the Class
If you'd like to be able to bulk import users directly into a class, your account administrators can import users via a csv file on the Users tab and upload these directly to the class that you've created. This is carried out on the User Tab (Bulk user upload instructions here).
Once added, the class admin will need to invite the learner(s) to enrol into the class by selecting the mail icon next to the learner's name. An invitation email is then triggered with instructions on how to join the class. Bulk invitations to all users in the class can be sent by selecting SEND INVITATION from the Class page.

Greeting Text
You can add an additional greeting text on the enrolment forms. For example, this could link to organisation specific instructions or disclaimers. We advise not to make this too long, but instead link to external documents using HTML.
This greeting will appear for users on the Self Enroll page and/or in the app.
Copy members from
When you create a new class, you can choose to copy all the members of another class to this one. This avoids having to enrol them again when it's the same group of learners. You can only do this when you first create a class and are not using self-enrolment.
From the drop-down list, select one of your other classes. All the members of this class will be added to your new class.
Advanced
Additional admins & coaches
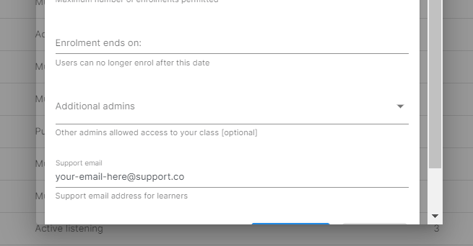
When you create a class, you are the owner of that class and normally, only you can see it within Bodyswaps Go. However, you can also assign additional admins and coaches to help manage this class if you'd like. Simply select their names from the drop-down list.
Support Email
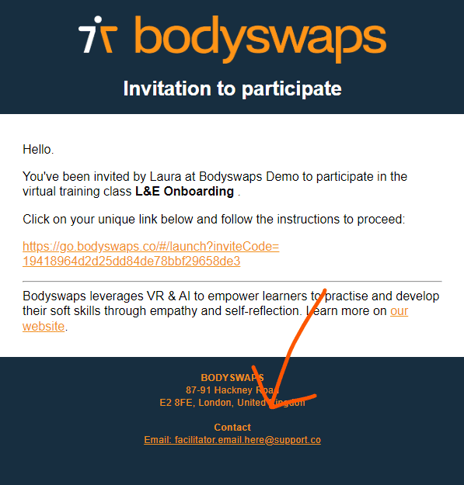
If you would like to act as the first point of contact for Learner support, you can include your email address (instead of support@bodyswaps.co) in automated system emails to your enrolled learners.
On the class invite, the email will appear as shown below:
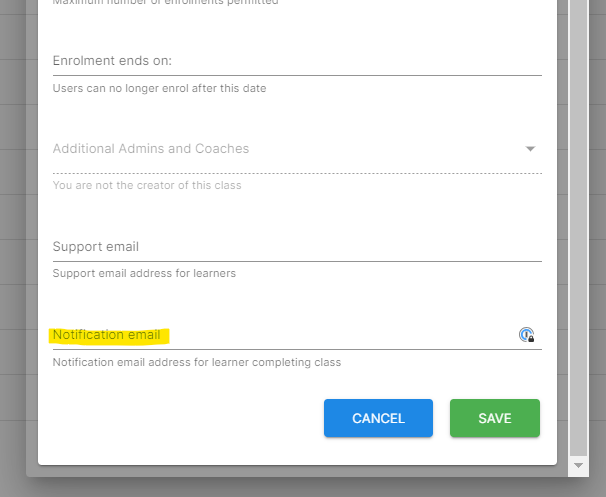
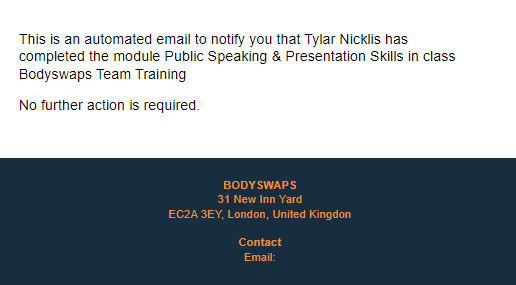
Notification Email
If you would like to receive notification emails when each Learner enrolled in the class completes one of the assigned modules, you can include your email when creating the class as shown in the image below (or you can go back and update an existing class using the pencil icon next to the class page in the Classes tab).
Class Management
Enrolling Learners and monitoring progress is covered in detail here.
After the class has been created, you can navigate settings using the options shown in the image below.
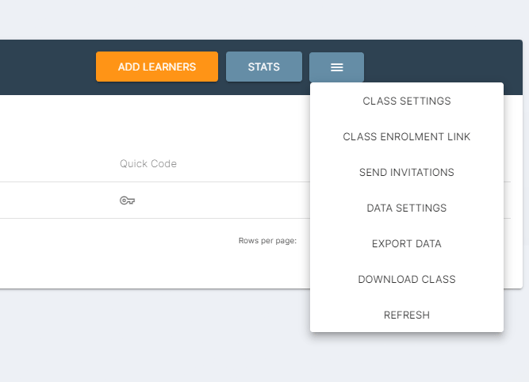
To see the class usage and success factors feedback, click on Stats.
Generating Quick Codes for Learners
There is a new 'key' icon next to each member in the class.- Pressing this will generate a 72-hour access code for that user.
- This code is displayed in a new column called Quick Code.
- You can use the Download Class function to download a CSV of all users and their codes.
Class Code
Your class users can now sign into Bodyswaps using a single code, more information in the video below
Downloading Class Data
By clicking Download Class, you can export a CSV file of the learners enrolled in this class as shown in the image below.
Within the exported CSV file, you'll receive:
- Learner's names
- Learner's email addresses
- Access Codes (if generated)
- Assigned module progress
.png?width=549&height=71&name=image%20(12).png)
Tag Search
You can now search the list of enrolled users in each class using a Tag (set at user level).
Class Learner Tracking in Class Overview
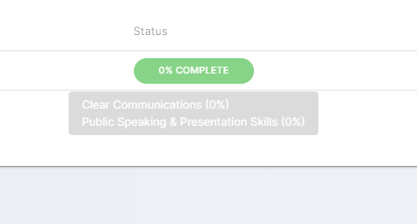
From Bodyswaps Go, you can monitor the status of each learner in the class as shown in the image below.

The possible status messages are:
- REQUIRES INVITE - learner has been enrolled, but hasn’t received an invite email. You can do this by using the invite function.
- # INVITE SENT - learner has been sent an invite, but they’ve not started the module yet.
- STARTED - learner has gone into the module in the Bodyswaps app, but not completed it yet.
- % COMPLETED - learner has completed the module - hover over the % complete bar to view more details.
Tracking on an individual's user page in a class
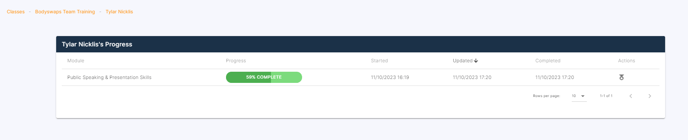
After clicking on an individual student, a progress bar shows how many of the assigned modules that enrolled learner has completed in a class at an individual level as shown in the image below. You'll also be able to see:
- when they started the module
- when their progress was last updated
- when the module was completed
- a link to their certificate
Learner View
You can learn more about the Learner’s view when joining a class by clicking here. You can also share the linked article with them directly.